Gateway VPN requires at least one dedicated IP address on your account.
Dedicated IP addresses can be added for $2.00/month each.
The Gateway VPN section of the portal allows you to map VPN clients default gateways to a public IP address we provide.
The functionality allows you to browse the web and make outgoing requests without exposing your IP address at home.
Additionally, it allows us to route connections to you rather than NAT them, so your home server can see source IP addresses of port forwarded connections, rather than everything appearing to come from the NAT gateway's IP.
For a broad overview of how the infrastructure works, check out our Getting Started Guide.
¶ Enabling Gateway VPN
To enable the Gateway VPN feature, simply navigate to the Gateway VPN section in the portal.

If you do not have the feature enabled for your account, you will be presented with an upgrade prompt.
Assuming you have a dedicated IP address (required), you will see a page that looks like this:
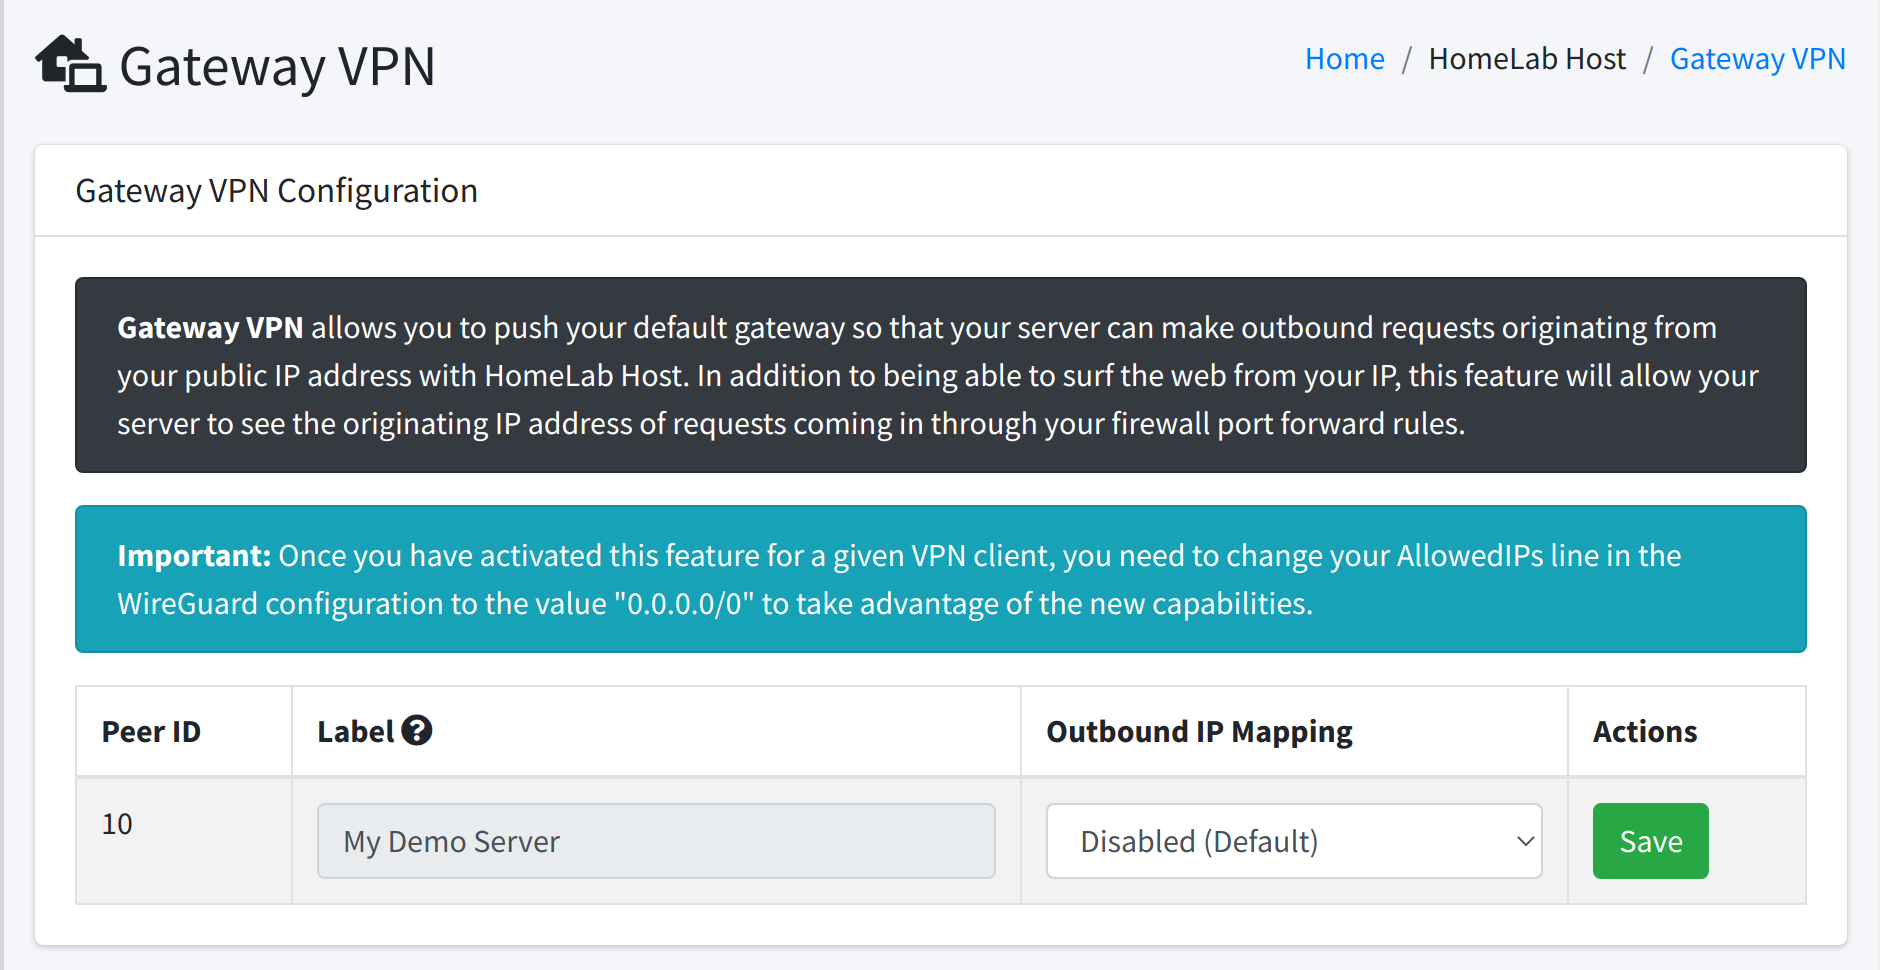
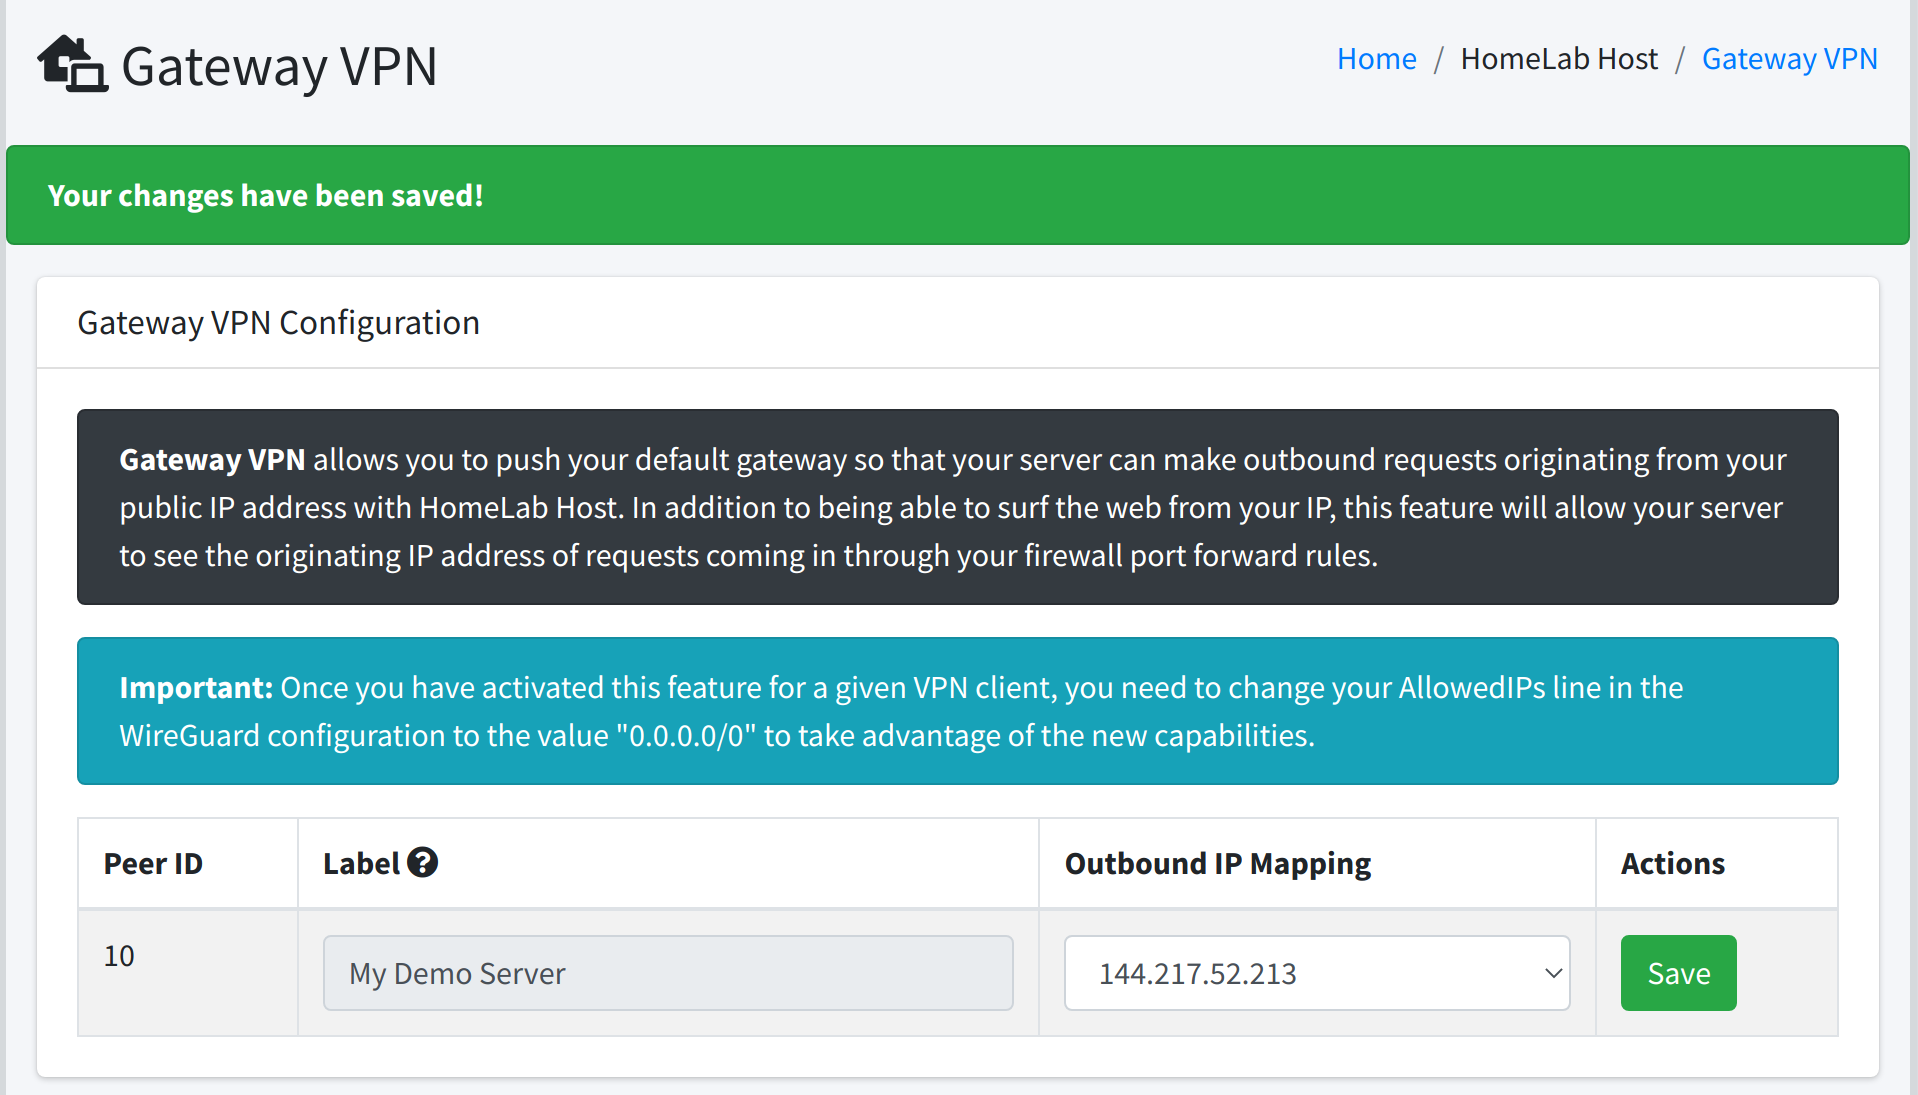
As you can see, Gateway VPN is disabled by default. To enable it for a given VPN client, simply select the public IP address on your account that you want to route the traffic out of, then click the green Save button.
¶ Using Gateway VPN
Once you have applied the setting in the portal above, the feature is available, but a change to your WireGuard configuration file is necessary to use this feature.
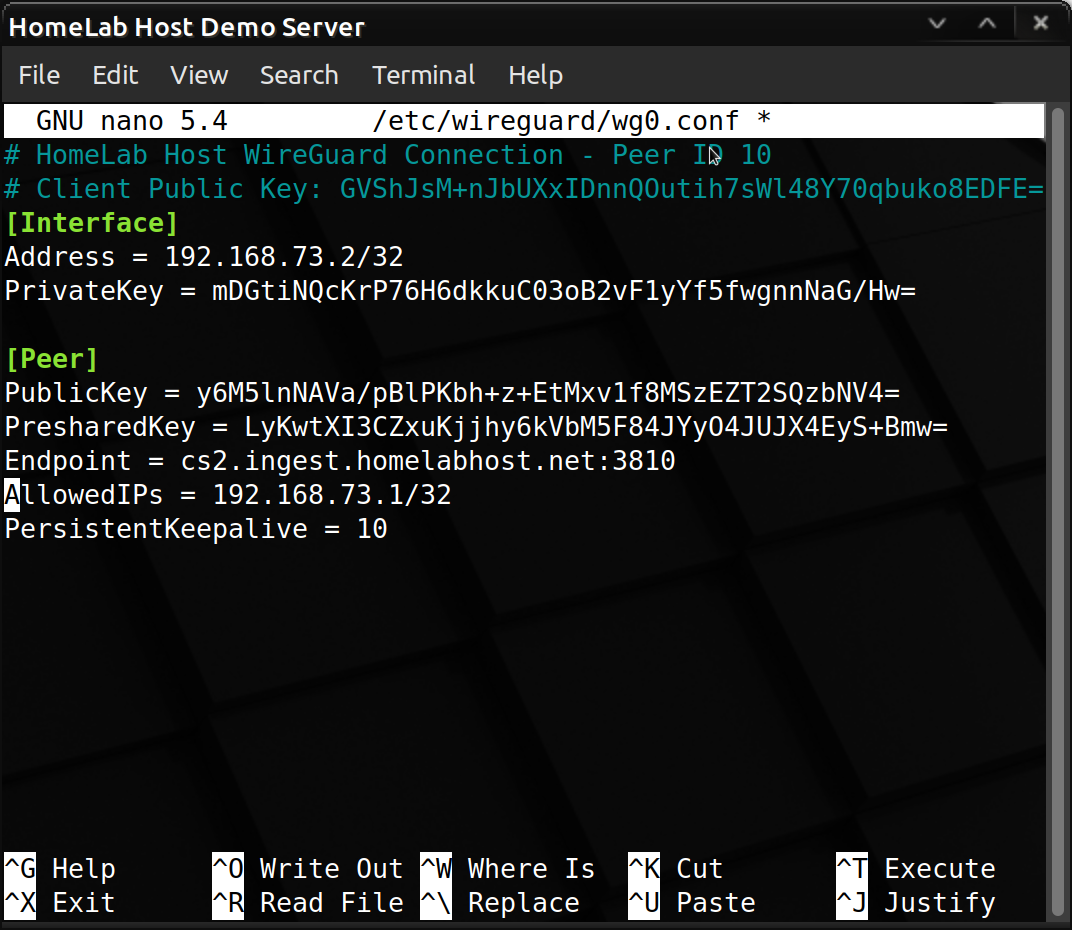
Open your WireGuard configuration on the client and find the line that starts with "AllowedIPs". By default, this line only contains the IP address of the gateway.
Now, you want to route all outgoing traffic through the WireGuard tunnel, so you should change your AllowedIPs to 0.0.0.0/0.
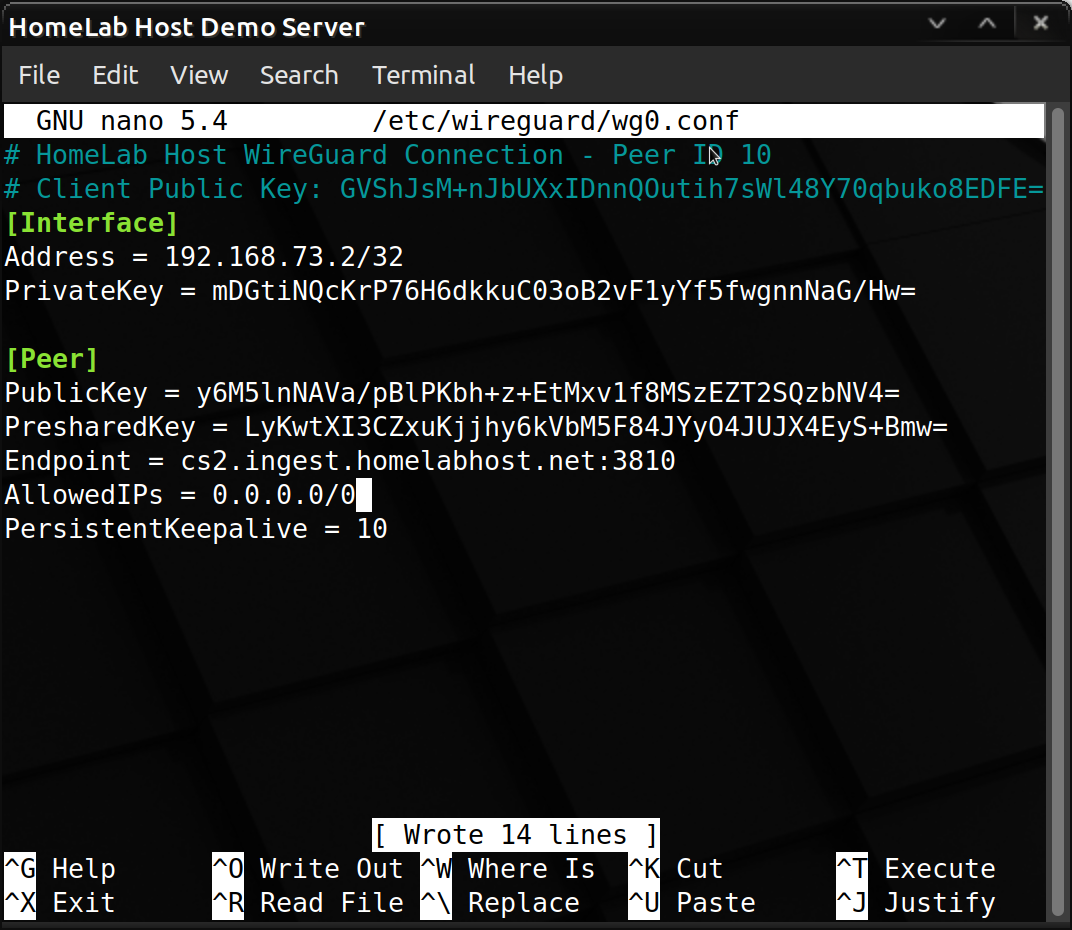
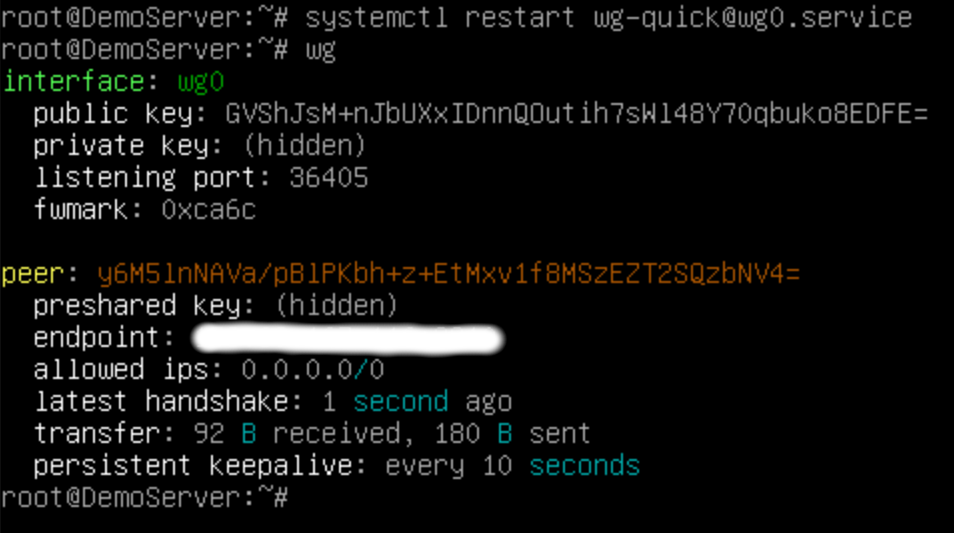
Then, simply restart your WireGuard tunnel. (On a Linux server, run systemctl restart wg-quick@wg0.service).
Now, we can check with the wg show command on our client and verify that the AllowedIPs setting is now 0.0.0.0/0.
We can also check with an MTR and indeed see that our outgoing traffic is now heading out our WireGuard gateway, 192.168.73.1.
